OneTouch Verio Flex: A Comprehensive User Manual Guide (Updated 04/01/2026)
Today, April 1st, 2026, marks the release of this guide for the innovative OneTouch Verio Flex system, offering users a modern blood glucose monitoring experience.
The OneTouch Verio Flex blood glucose monitoring system represents a significant advancement in self-monitoring technology. As the newest iteration of the OneTouch Verio family, this meter is designed with user experience and insightful data management at its core. This comprehensive guide will walk you through every aspect of using your new meter, from initial setup and testing procedures to understanding your results and utilizing the companion app.
This system isn’t just about measuring blood glucose; it’s about empowering you to take control of your health. The Verio Flex offers a streamlined testing process, clear display readings, and convenient data tracking. We’ll cover everything you need to know to confidently and accurately monitor your glucose levels, helping you make informed decisions about your well-being.
What’s Included in the Box?
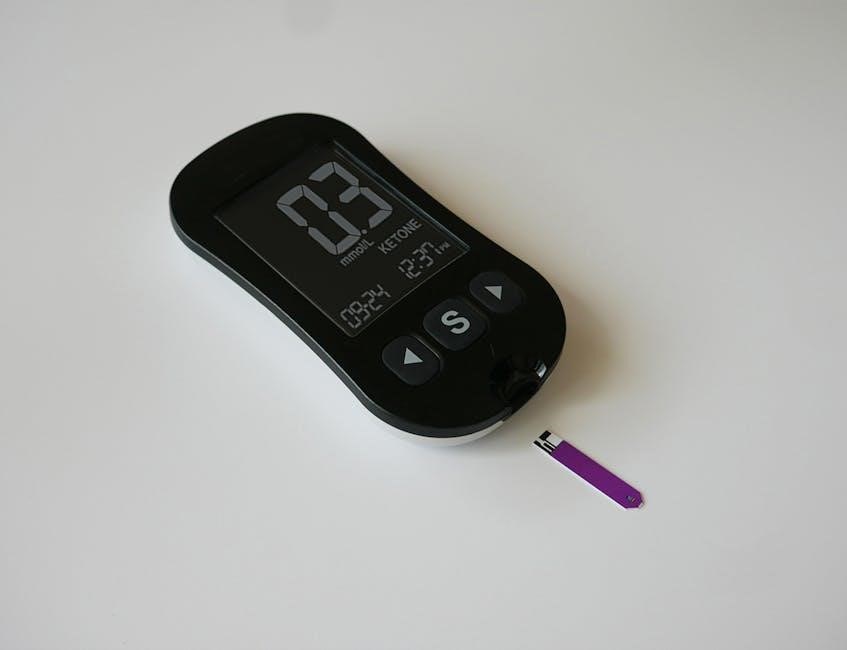
Upon opening your OneTouch Verio Flex package, please ensure all components are present. You should find the OneTouch Verio Flex meter itself, designed for accurate and easy blood glucose readings. Also included is a lancing device with a safety cap, for comfortable blood sample collection. A sample pack of OneTouch Verio Flex test strips is provided to get you started immediately.
Furthermore, the box contains a battery (typically AAA), a quick start guide for initial setup, and a user manual – this document! You’ll also find a reference card summarizing key features and a USB cable for data transfer. Verify all items are present before proceeding; contact customer support if anything is missing.
Key Features and Benefits
The OneTouch Verio Flex boasts several innovative features designed to simplify blood glucose monitoring. Its ColorSure® Dynamic Range Indicator clearly shows readings within, above, or below your target range. Bluetooth® connectivity allows seamless data synchronization with the OneTouch Verio Flex app on your smartphone.
Benefit from personalized insights and reports to better understand your glucose patterns. The meter’s compact design ensures portability, while the easy-to-read display provides clear results. Enjoy the convenience of meal markers and notes within the app for comprehensive tracking. This new generation meter offers a significant advancement in diabetes management;

Setting Up Your OneTouch Verio Flex
Initial setup is simple! This section guides you through inserting the battery, setting the correct date and time, and adjusting display preferences easily.
Inserting the Battery
Powering your OneTouch Verio Flex is straightforward. Locate the battery compartment on the back of the meter. Gently slide the battery cover off, typically in the direction indicated by an arrow. Insert a fresh, standard 3V CR2032 battery, ensuring correct polarity – positive (+) side up.
Double-check the battery alignment before fully closing the battery compartment cover. A properly inserted battery will activate the meter display. If the screen doesn’t illuminate, verify the battery’s orientation and replace it if necessary. Avoid using damaged or corroded batteries. Proper battery installation ensures accurate readings and reliable operation of your glucose monitoring system.
Setting the Date and Time
Accurate date and time settings are crucial for proper data logging and tracking within the OneTouch Verio Flex system. Upon initial setup, the meter will prompt you to set the date and time. Use the buttons on the meter to navigate through the month, day, year, hour, and minute settings.
Confirm each selection by pressing the designated button. Ensure you choose the correct AM or PM designation. Accurate time-stamping allows for precise correlation of blood glucose readings with meals, exercise, and other relevant events. Refer to the meter’s display for clear instructions during this process, ensuring your data is consistently and accurately recorded.
Adjusting Brightness and Volume
Personalize your OneTouch Verio Flex experience by adjusting the screen brightness and audio volume to suit your preferences and environment. Access these settings through the meter’s menu, typically navigated using the control buttons. You can select from several brightness levels to ensure clear visibility in various lighting conditions.
Similarly, adjust the volume for audible cues, such as button presses and alerts. Lower the volume for discreet operation or increase it for enhanced audibility. These adjustments contribute to a more comfortable and user-friendly experience, ensuring the meter is easily readable and audible for all users, regardless of their individual needs.

Understanding the Meter Display
The OneTouch Verio Flex meter’s display clearly presents your blood glucose results, alongside vital icons and alerts for informed diabetes management.
Icon Definitions and Alerts
The OneTouch Verio Flex meter utilizes a series of icons to quickly communicate important information. A full battery icon indicates sufficient power, while a low battery icon prompts replacement. Strip OK confirms proper test strip insertion and functionality. Error icons signal potential issues, requiring troubleshooting – consult the manual for specific codes.
Alerts are crucial for proactive management. High and low glucose alerts, customizable within the settings, notify you when readings exceed defined ranges. Meal markers, when activated, visually indicate readings taken around meal times. The meter may also display alerts related to strip quality or potential interference. Understanding these icons and alerts empowers you to respond effectively to your glucose levels and maintain optimal control.
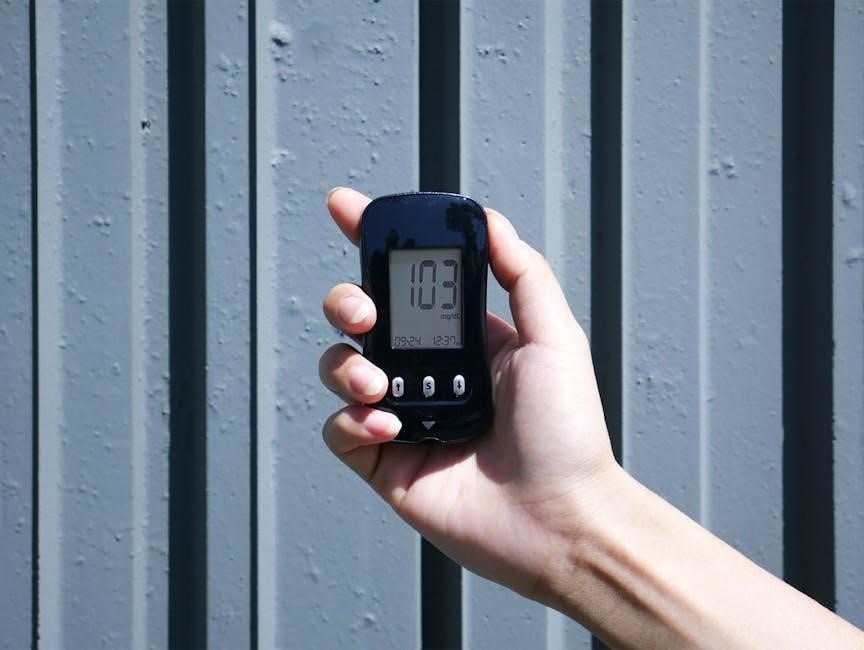
Blood Glucose Reading Interpretation
Understanding your blood glucose readings is fundamental to effective diabetes management. The OneTouch Verio Flex displays results in mg/dL. Generally, readings before meals should fall between 80-130 mg/dL, and 1-2 hours after meals, below 180 mg/dL. However, individual targets vary – consult your healthcare provider for personalized goals.
Consistent high readings may indicate inadequate medication or dietary adjustments. Low readings could signal over-medication, skipped meals, or excessive activity. Pay attention to trends; a single outlier isn’t as concerning as consistently high or low values. Record your readings and any associated symptoms to share with your doctor for informed decision-making.
Memory Recall and Data Review
The OneTouch Verio Flex meter stores your blood glucose readings, allowing you to track patterns over time. To access your history, use the up and down buttons to navigate through previously recorded results. The meter displays the date and time of each reading.
You can view average readings (7, 14, and 30-day averages) to identify trends. This data is invaluable for understanding how diet, exercise, and medication affect your glucose levels. Synchronization with the OneTouch Verio Flex app provides even more detailed analysis and reporting capabilities, offering a comprehensive overview of your glucose management journey.

Testing Your Blood Glucose
Accurate blood glucose testing with the OneTouch Verio Flex involves preparing the lancing device, obtaining a sample, and applying it to a test strip.
Preparing the Lancing Device
The OneTouch Verio Flex lancing device is designed for comfortable and accurate blood sampling. Begin by removing the protective cap. Then, firmly screw in a new, sterile lancet, ensuring it’s securely fastened – do not reuse lancets!
Adjust the depth setting on the device; start with a shallower setting and increase if needed to obtain an adequate blood drop. This minimizes discomfort.
Pull back the plunger to prime the device, and then release. The device is now ready for use. Always use a fresh lancet for each test to maintain sterility and accuracy. Proper preparation ensures a smooth and less painful testing experience.
Obtaining a Blood Sample
Before testing, wash your hands thoroughly with warm water and dry them completely. Select a puncture site on the side of your fingertip – avoid the center for less sensitivity.
Press the primed lancing device firmly against the chosen site and press the release button. A small drop of blood will appear.
Gently squeeze your finger near the puncture site to encourage blood flow, avoiding excessive squeezing which can affect results. Wipe away the first drop of blood with a clean, dry cloth. A sufficient, hanging drop is crucial for accurate measurement with the OneTouch Verio Flex system.
Applying Blood to the Test Strip
Insert a new OneTouch Verio Flex test strip into the meter, ensuring the gold contact strip faces upwards and is fully inserted. The meter will automatically power on and display a “Ready” symbol.
Bring the drop of blood obtained from your fingertip into contact with the designated sample area on the test strip. Do not smear the blood; allow it to be drawn into the strip by capillary action.
The meter will begin counting down, and the blood glucose reading will be displayed within seconds. Ensure adequate lighting for accurate meter reading and strip application.

OneTouch Verio Flex Test Strips
Utilizing specialized Verio Flex strips ensures accurate results; understanding coding, proper storage, and troubleshooting potential errors are crucial for reliable blood glucose monitoring.
Understanding Test Strip Coding
The OneTouch Verio Flex test strips are designed with AutoSense technology, eliminating the need for manual coding in most cases. This feature significantly reduces the risk of errors associated with incorrect coding. However, it’s vital to verify if your specific batch of strips requires coding upon initial use.
If coding is necessary, the meter will prompt you during setup. You’ll find a code number printed on the test strip vial; carefully enter this code into the meter following the on-screen instructions. Incorrect coding can lead to inaccurate blood glucose readings, potentially impacting your diabetes management decisions. Always double-check the code against the vial before confirming.
Regularly confirm that the correct code is active within your meter’s settings, especially when starting a new vial of test strips. AutoSense simplifies the process, but vigilance remains key for dependable results;
Proper Test Strip Storage
Maintaining the integrity of your OneTouch Verio Flex test strips is crucial for accurate results. Always store the strips in their original vial, tightly closed, to protect them from moisture, heat, and light. Exposure to these elements can degrade the strips and compromise their performance.
Ideal storage conditions involve a cool, dry place, typically between 60°F and 86°F (16°C and 30°C). Avoid storing strips in bathrooms or kitchens due to fluctuating humidity levels. Do not transfer strips to other containers, as this increases the risk of contamination and degradation.
Check the expiration date printed on the vial before each use. Expired strips may yield inaccurate readings. Discard any strips that appear damaged or discolored. Proper storage ensures reliable performance and accurate blood glucose monitoring.
Troubleshooting Test Strip Errors
If you encounter an error message while using OneTouch Verio Flex test strips, first ensure the strip is properly inserted into the meter. A common error, “Strip Error,” often indicates a faulty or damaged strip. Try a new strip from a fresh, unopened vial.
Check the expiration date and storage conditions; expired or improperly stored strips are frequent culprits. If the error persists, ensure your hands are clean and dry before handling the strip. Avoid touching the test area.
Restarting the meter can sometimes resolve temporary glitches. If problems continue, consult the OneTouch Verio Flex support website or contact customer service for further assistance. Never reuse a test strip.

Using the OneTouch Verio Flex App
Seamlessly connect your OneTouch Verio Flex meter to your smartphone via Bluetooth, enabling automatic data synchronization and unlocking personalized insights for better diabetes management.
Connecting to Your Smartphone
Before you begin, ensure your smartphone has Bluetooth enabled and is running a compatible operating system (iOS or Android). Download the OneTouch Verio Flex app from your device’s app store.
Open the app and follow the on-screen instructions to create an account or log in if you already have one. The app will then prompt you to pair your meter.
On your OneTouch Verio Flex meter, navigate to the Bluetooth settings (refer to the ‘Advanced Features & Customization’ section for details). Select ‘Pair Device’ and the app will automatically detect your meter.
Confirm the pairing request on both your smartphone and the meter. Once connected, the app will display a confirmation message, and your meter’s readings will begin synchronizing automatically.
Data Synchronization and Logging
Automatic synchronization is a key benefit of connecting your OneTouch Verio Flex meter to the app. Each time you test your blood glucose, the reading is automatically transferred to your smartphone via Bluetooth, eliminating manual logging.
Within the app, your data is securely stored and organized into a clear, easy-to-understand logbook. You can view your readings by day, week, month, or custom date range.
The app also allows for adding notes to each reading, such as meal details, exercise, or medication taken. This contextual information helps you identify patterns and understand how different factors affect your glucose levels.
Data can be exported and shared with your healthcare provider, facilitating informed discussions about your diabetes management plan.
Personalized Insights and Reports
The OneTouch Verio Flex app goes beyond simple data logging, offering personalized insights based on your blood glucose readings and logged information. The app analyzes your data to identify trends and patterns specific to you.
Receive customized reports that highlight your average glucose levels, time in range, and potential areas for improvement. These reports can be viewed within the app or shared with your healthcare team.
Smart learning technology adapts to your individual needs, providing tailored guidance and support. The app can even predict potential high or low glucose events based on your historical data.
Benefit from actionable advice and encouragement to help you stay motivated and achieve your diabetes management goals.

Advanced Features & Customization
Unlock personalized control with customizable alerts, meal markers, and test time settings, empowering you to tailor the OneTouch Verio Flex to your lifestyle.
Setting High/Low Glucose Alerts
Personalized alerts are a cornerstone of proactive diabetes management with the OneTouch Verio Flex. This feature allows you to define your individual high and low glucose thresholds, receiving notifications when readings fall outside your target range.
To configure these alerts, navigate to the “Settings” menu on your meter. You’ll be prompted to enter your desired high and low values – consult your healthcare provider for personalized recommendations. The meter will then audibly and visually alert you when readings exceed or fall below these set points.
These timely notifications empower you to take immediate action, whether it’s adjusting your diet, activity level, or medication, helping you maintain stable glucose control and overall well-being. Remember to regularly review and adjust your alert settings as needed.
Meal Markers and Notes
The OneTouch Verio Flex enhances data analysis with convenient meal markers and note-taking capabilities. After each blood glucose test, you can tag the reading as “Breakfast,” “Lunch,” “Dinner,” or “Snack,” providing valuable context for understanding post-meal glucose responses.
Beyond pre-defined markers, the system allows you to add custom notes to each reading. This is incredibly useful for recording details like specific food choices, exercise routines, stress levels, or medication adjustments.
These detailed records, accessible through the meter’s memory and the connected smartphone app, facilitate informed discussions with your healthcare team and help identify patterns impacting your glucose levels. Consistent use of meal markers and notes unlocks deeper insights into your diabetes management.
Customizing Test Times
The OneTouch Verio Flex understands that individual testing schedules vary. This system allows for personalized test time customization, moving beyond pre-set reminders to fit your lifestyle. You can program specific alarms to prompt testing at desired intervals – before meals, two hours post-meal, at bedtime, or any other frequency recommended by your healthcare provider.
Access the settings menu on your meter to adjust these test time reminders. The flexibility ensures consistent monitoring without disrupting your daily routine.
Regular, customized testing, combined with meal markers and notes, provides a comprehensive dataset for effective diabetes management. Tailoring test times empowers you to proactively track glucose trends and make informed decisions.

Maintenance and Care
Regular cleaning with a damp cloth, proper battery replacement, and addressing common issues will ensure your OneTouch Verio Flex meter functions optimally for years.
Cleaning the Meter
Maintaining a clean meter is crucial for accurate readings and longevity. Always disconnect the meter from any power source before cleaning. Use a lightly dampened cloth – never immerse the meter in water or any cleaning solution. A mild soap solution can be used, but ensure no liquid enters the meter’s ports.
Pay particular attention to the test strip port, gently wiping away any potential blood residue. Avoid abrasive cleaners or harsh chemicals, as these can damage the meter’s surface and internal components. After cleaning, thoroughly dry the meter with a soft, lint-free cloth before re-inserting the battery or connecting it to a power source. Regular cleaning, even just a quick wipe-down, will contribute significantly to the reliable performance of your OneTouch Verio Flex.
Replacing the Battery
The OneTouch Verio Flex utilizes standard batteries, easily replaceable when depleted. A low battery indicator will appear on the meter’s display, signaling the need for a change. Gently open the battery compartment, typically located on the back of the device. Remove the old battery, noting the correct polarity (+ and -) indicated inside the compartment.
Insert a new battery, ensuring proper alignment with the polarity markings. Close the battery compartment securely. Do not mix old and new batteries, or different battery types. Dispose of used batteries responsibly, following local regulations for battery recycling. A fresh battery will restore full functionality to your meter, ensuring accurate and consistent blood glucose readings.
Troubleshooting Common Issues
If your OneTouch Verio Flex displays an error message, consult the meter’s display guide for specific meanings. “Strip Error” often indicates improper strip insertion or a damaged strip – ensure correct orientation and use a fresh strip. Inaccurate readings may stem from insufficient blood sample size; retest with a larger drop.
Connectivity problems with the app can usually be resolved by ensuring Bluetooth is enabled on both your meter and smartphone. If the meter won’t turn on, replace the battery. For persistent issues, refer to the full troubleshooting section in this manual or contact OneTouch customer support for assistance. Regular maintenance helps prevent many common problems.

Safety Information and Precautions
Always handle used lancets and test strips as biohazardous waste, disposing of them properly in a sharps container to prevent accidental injury or infection.
Proper Disposal of Sharps
Safe disposal of sharps – used lancets and test strips – is crucial to prevent accidental needlestick injuries and the potential spread of bloodborne pathogens. Never discard these items in regular trash. Always utilize an FDA-cleared sharps container; these are puncture-resistant and designed for safe containment.
You can obtain sharps containers from pharmacies, healthcare providers, or online retailers. Once the container is approximately three-quarters full, follow your local regulations for proper disposal. Many communities offer sharps collection programs or designated drop-off locations.
If a sharps container isn’t immediately available, use a heavy-duty plastic container with a tight-fitting, puncture-proof lid, clearly labeled “Sharps – Do Not Recycle.”
Storage Conditions
Proper storage is essential to maintain the accuracy and functionality of your OneTouch Verio Flex meter and test strips. Store the meter in a clean, dry place, away from extreme temperatures and humidity. Avoid direct sunlight and areas prone to moisture, like bathrooms.
Test strips are particularly sensitive to environmental conditions. Keep the test strip vial tightly closed immediately after removing a strip. Store them in a cool, dry place, ideally between 60°F and 86°F (16°C and 30°C). Do not refrigerate or freeze test strips.
Always check the expiration date on both the meter and test strips before use. Expired strips can yield inaccurate results. Ensure the storage area is inaccessible to children and pets.
Warranty Information
Your OneTouch Verio Flex blood glucose monitoring system is covered by a limited warranty against defects in materials and workmanship. This warranty typically begins on the date of purchase and lasts for a specified period, often one year, but may vary by region.
The warranty covers the meter itself; test strips, lancets, and control solution are generally not included. Damage caused by misuse, accidents, or unauthorized repairs voids the warranty. To make a warranty claim, retain your proof of purchase and contact OneTouch customer support.
For complete warranty details, including terms and conditions, please refer to the separate warranty document included in the product packaging or visit the official OneTouch website. Registration of your meter may be required to activate certain warranty benefits.